
ESPresense room presence system.
In this tutorial we are going to create room presence sensors with ESPresense and our new developed Homey app.
Step 1: Install Homey apps
Make sure the following apps are installed:
Step 2 Configure MQTT Broker
Configuring the MQTT Broker app.
Open the Homey app -> naviagte to more -> navigate to apps -> navigate to MQTT Broker -> settings icon on the right top -> App settings
We are going to set the follwing options.
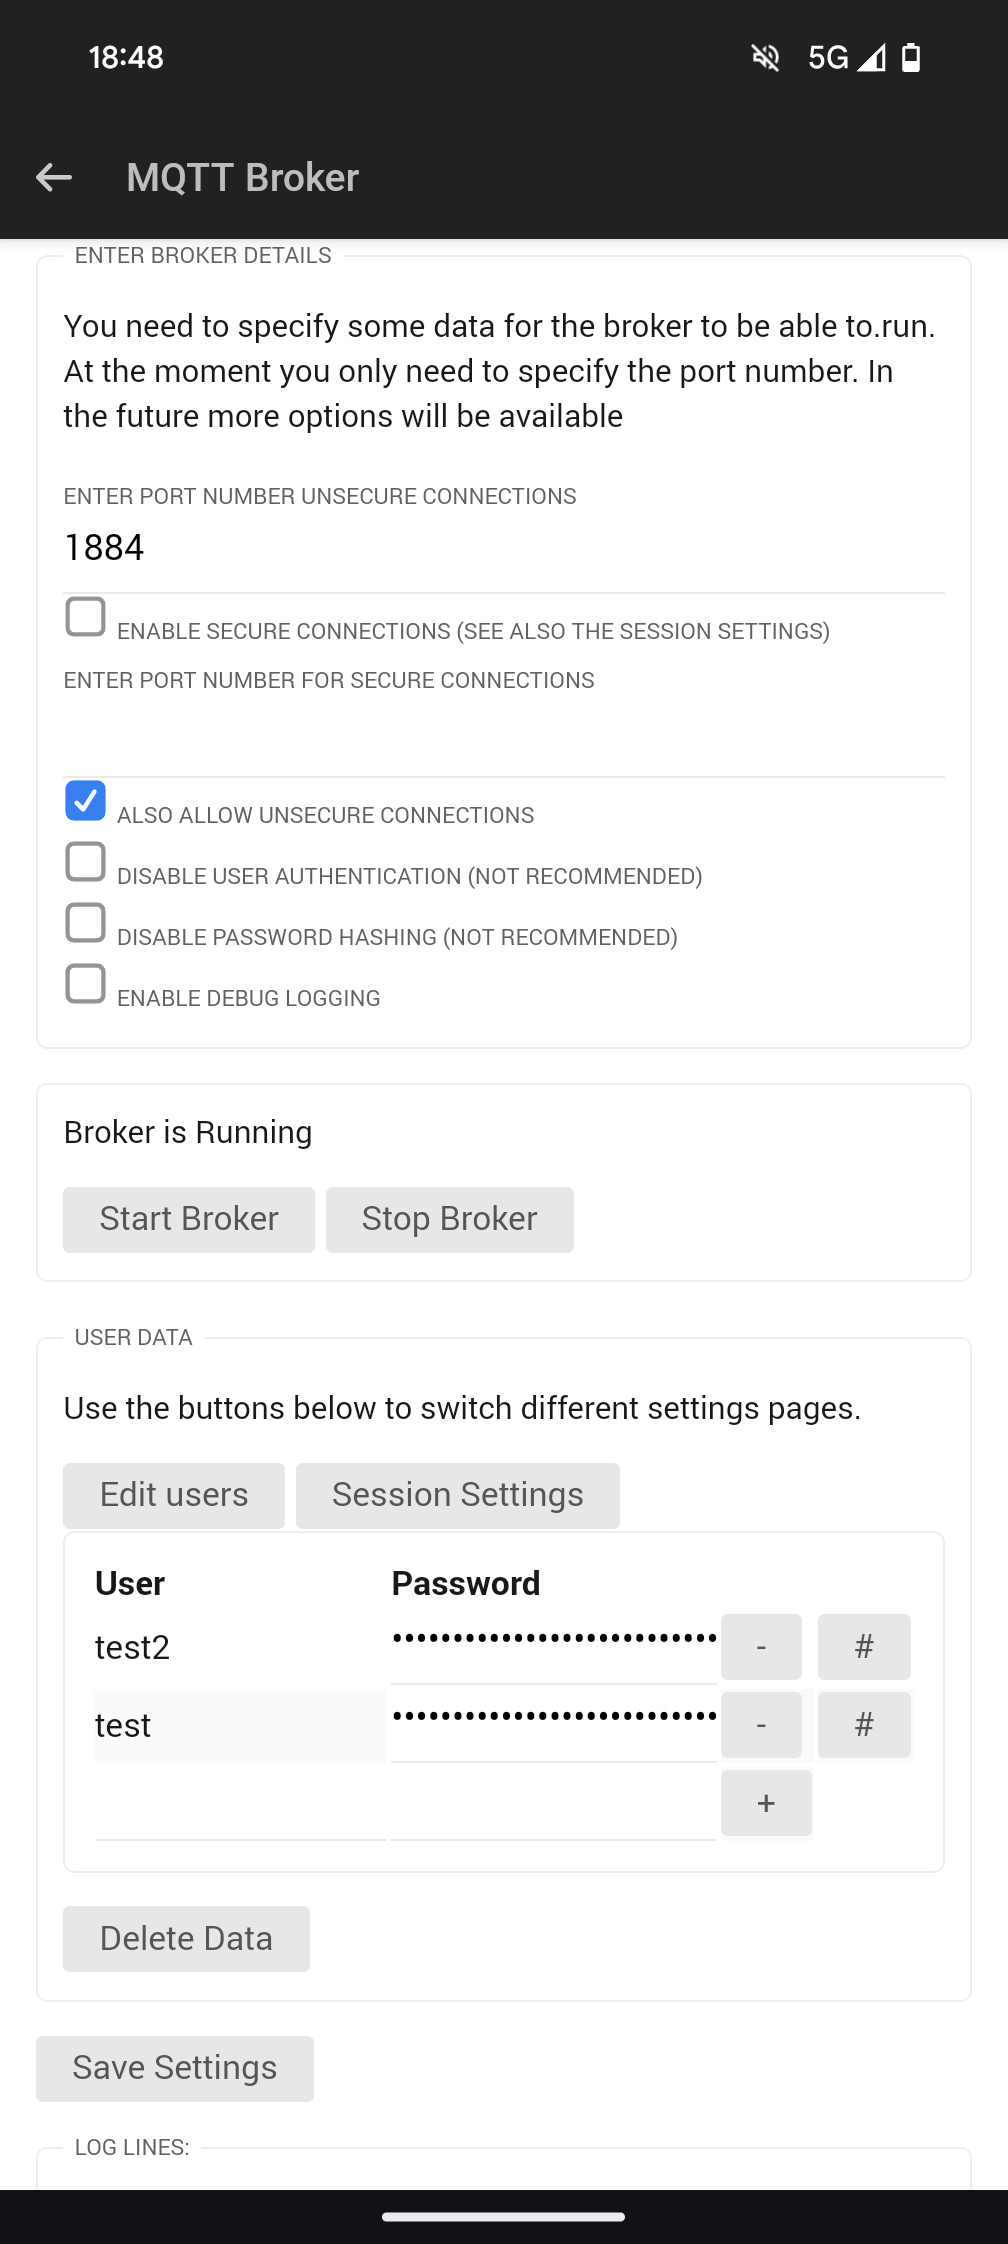
As port i am using 1884 you can choose what ever you want but I recommend choosing this port because it won't interfear with other MQTT servers.
The only checkbox you need: "Also allow unsecure connections"
Create a user, in my instance I am creating an user with username test and password test.
Save settings and then start the broker.
You should end-up with something like this:
Step 3: Configure your ESP32 with ESPresense
I am not really going into detail about how to install the ESPresense firmware since they made their own documentation.
Click here to see their documentation
Step 4: Configure ESPresense itself
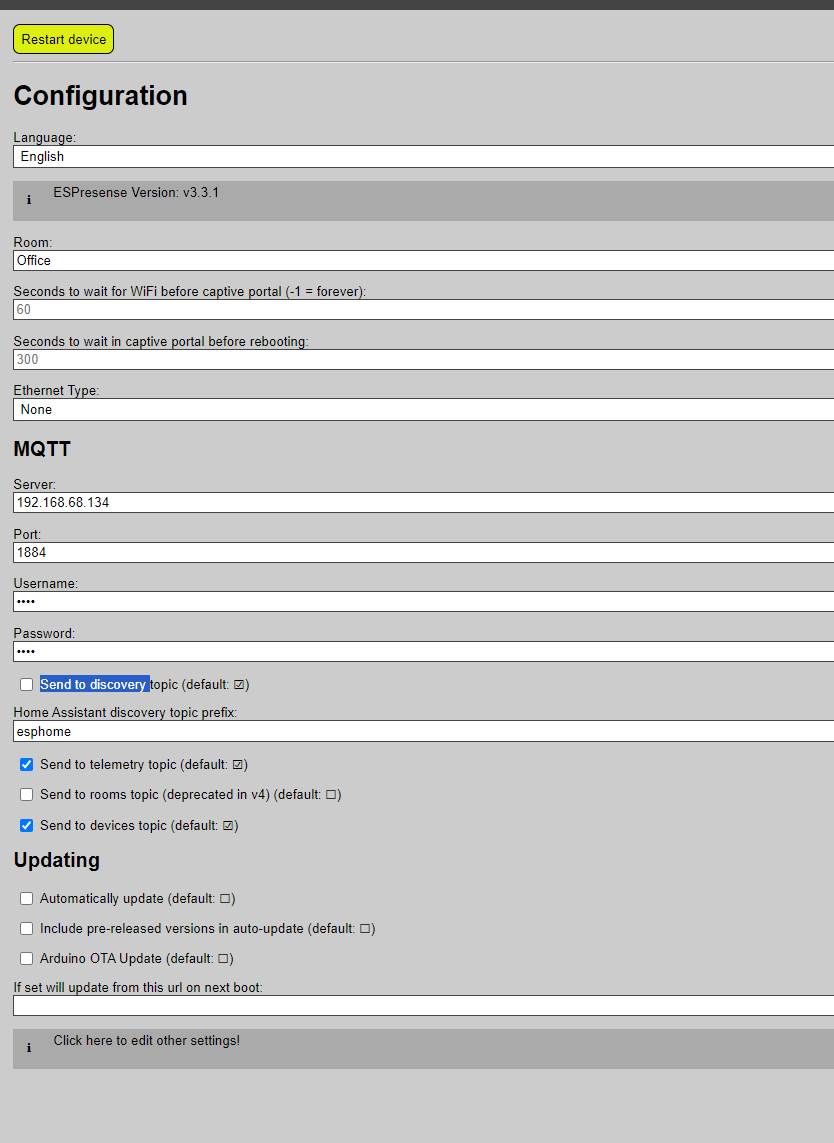
Go to the IP address of your ESP32 in your browser and configure the following:
Configuration
Room: Your desired room name
MQTT
server: Ip address of your Homey
port: The port you have choosen in the case of this tutorial it is 1884
username: The username you have choosen in the case of this tutorial it is "test"
password: The password you have choosen in the case of this tutorial it is "test"
Uncheck "Send to discovery topic" <- since we don't use Home assistant
And press Save
You should end-up with something like:
Step 5: Adding your devices
This is the hard part but there are plenty of explenations online!
Make sure you do this in:
http://YOUR_ESP32_IP/ui/#/settings
Step 6: Configure the Homey ESPresense app
Open the Homey app -> naviagte to more -> navigate to apps -> navigate to ESPresense -> settings icon on the right top -> App settings
MQTT
Server: Your Homey server ip
port: The port you have choosen in the case of this tutorial it is 1884
username: The username you have choosen in the case of this tutorial it is "test"
password: The password you have choosen in the case of this tutorial it is "test"
Mapping
ESPresense ID: Your ESPresense id of the device, in my case: "irk:86....."
Usable name: How you want this device to be called in Homey, in my case: "Pixel 8 pro"
After this save the settings on the bottom of the page then restart the ESPresense app

Step 7: Add your ESP32 device in Homey
Add device -> ESPresense -> This should show up your rooms and add it

Step 8: Start creating flows

Danny on
Open beta (v0.9.2)